Today I was at the Dollar Tree (Again!) and I found these small bags that came in a set of two. I didn't really know what to do with them but then I thought maybe, possibly, I could make these into doll backpacks! For a while now I've been trying to find/make a doll backpack that would fit all of Josie and Mandy's school supplies and lunch. After experimenting with the first bag I created a perfect little backpack for the Dahls!
Here is the Tutorial:

Materials:
-Fabric Scissors
-Dollar Tree Bag
-Sewing Machine
-Thread (Matching the Color of Bag)
-Embroidery Thread
-Round Clear Plastic Bead
-Safety Pin
Instructions:
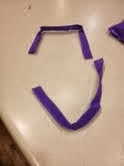
Step 1: Take the small bag and use the scissors to cut off straps, be careful, keep the straps intact!


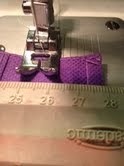
Step 2: Turn the Bag inside out and sew a seam on both sides about 2.5 centimeters in. make sure to leave the top and the bottom the same. Once you have sewn the seam on both sides, trim the excess.


Step 3: With the bag still inside out, flip the top of the bag down. The flap measuring down should be about 3.5 centimeters till the end.


Step 4: Sew around the inner edge of the flap (DO NOT SEW THE SIDES OF THE BAG TOGETHER)

Step 5: Turn the Bag right Side out
Step 6: Take one of the bag straps and fold the end over 1 centimeter, place it (still folded) about 1 cm away from the seam of the bag, sew across the fold (DO NOT SEW THE SIDES OF THE BAG TOGETHER)


Step 7: Take the rest of the strap and measure out 24 cm away from the top seam, then fold over at that mark
Step 8: Sew across the fold (SEW THE SIDES OF THE BAG TOGETHER)

Step 9: Repeat Steps 6-8 on the other side of the bag with the other strap


Step 11: Tie the end of your embroidery thread to the safety pin

Step 12: Feed the thread/safety pin through the bag casing, once it is all the way through and there is 13 cm of thread coming from both openings


Step 13: Cinch up the backpack and tie it off using the thread

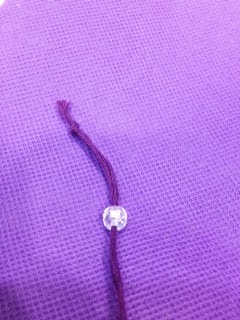
Step 14: Slip the bead onto the two strings and tie it off at the front (this way the bead slides on the thread) You can trim off a little of the string if you want to
Step 15: Enjoy your new Doll Back Pack!
